Home Dome

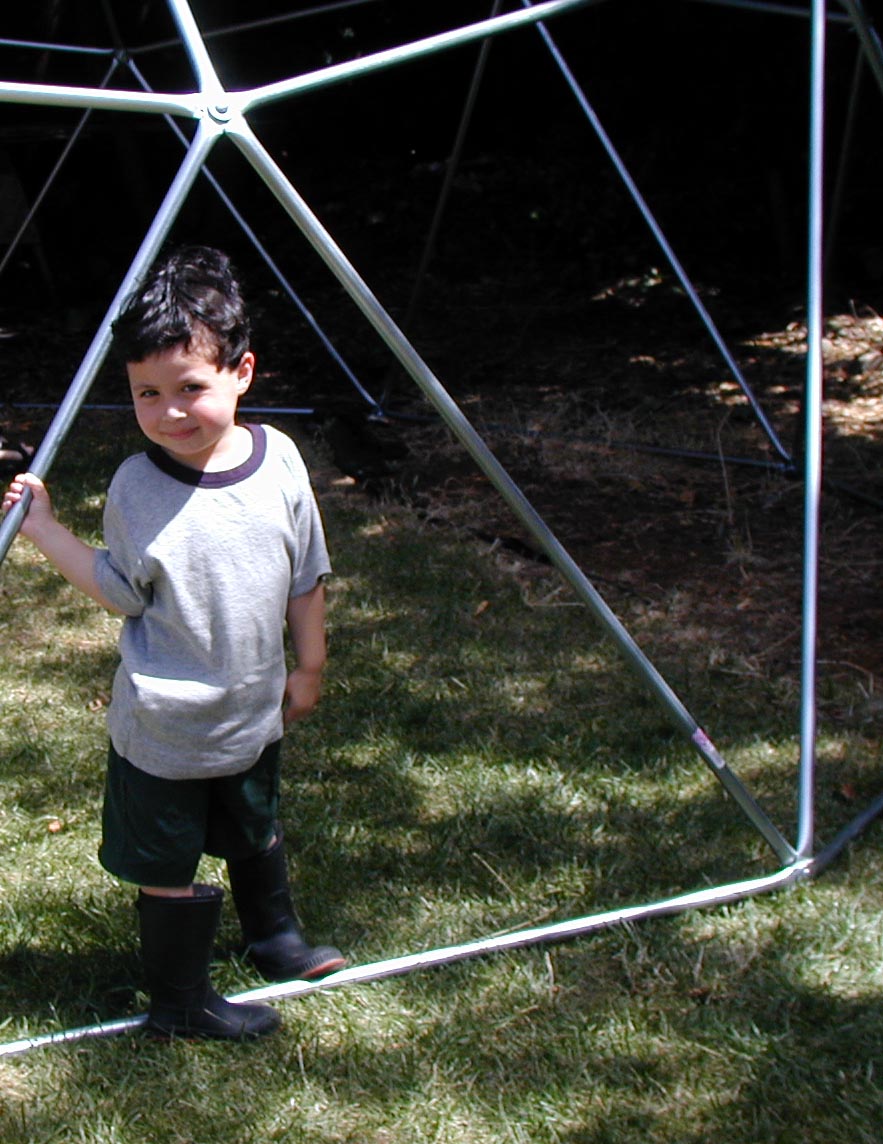
It's also fun to set up in the backyard for parties and so on.
One of the biggest advantages of geodesic domes is the redundancy: lots of identical pieces. When you manufacture the struts, you'll be doing the same thing over and over and over, so it's definitely worth your time to make decent jigs to "automate" all the measuring and alignment. Check the links page for some nice photos of jigs. Mine were too ugly to photograph but did the job.
The other way to take advantage of the redundancy is by making some spares of everything. My gut says 5% to 10% is probably about right. Just in case some struts get bent (or you made them a bit too short or long) or bolts get lost, you'll be glad you've got a couple of extras on hand.
To cut the conduit, i bought a small pipe cutter for $8. This was worthwhile, except that i noticed that as i cut more, the cuts started to spiral. What was happening was that the screw-pin holding the round cutter-blade was coming loose. However i didn't figure that out until after it fell out into the grass never to be seen again. Now i have to buy a whole new pipe cutter, at least that one was cheap. Next time i'll remember to check that pin frequently. In summary, the cutting was relatively easy, and the pipe cutter made nice clean cuts. I should also mention that i used a measuring jig (just marker lines on the workbench) to speed things considerably.
To squash the ends flat, first i read up on what everyone else was doing. Based on their experience i decided to spend a few bucks on a tool, in this case a 6-ton benchtop hydraulic shop press which i got from Harbor Freight (search for "shop press") for $70. (I couldn't find any other sources for this, if anyone knows of any please tell me.) This thing is actually a car jack in a special steel frame, so when you pump the jack a piston pushes down. You put a pair of iron plates (included) under where the piston goes (the bottom plate rests on the frame) and your victim goes between the plates and gets pinched between them. Each edge of the plates is a different shape (small round, large round, V-shape, or flat) but you want to use the large round edge. My "jig" for getting the squashed length right was just a piece of white electrical tape on the inside of the bottom plate at the right distance from the edge (1.5 inches). Of course, i followed the 45-degree seam recommendation and used a jig with a slot to make both squashed ends squashed in the same plane. I'm glad i got the shop press, but it's still a lot of back-straining work to squash that many ends. I was glad to finish that part of the job and get back to surfing the web for a while.
The next step was drilling the ends. Again, i plunked down some bucks for a tool, mostly because i don't have a drill press and it could be genuinely useful for plenty of other stuff (like building bigger geodesic domes). I bought a $99 Ryobi from Home Despot, mostly because i like intimidating other Americans with my dead-on pronuciation of the word "Ryobi". Also i bought a couple of titanium drill bits that are of the size just barely larger than 3/8 inch (the bolt size), we want a tight fit here. For the first ends, i drilled 3/4 inch from the conduit end, and for the other ends i used a jig with an upside-down bolt to hold the first hole in place as suggested by many. I checked here (because i am too lazy to calulate cosines myself) to see how much extra length to allow between holes --- for this case it was only about 1/8 inch. I included it in my measurements, but doubt that this is worth worrying about, really. While drilling, after a while i got smart and taped a sheet of clear plastic around the drill to cover as many degrees surrounding the drilling area as possible, and tucked the sheet under the drill press --- this really made cleaning up those metal slivers easier since the flyaways were fewer. It seemed like no matter how i adjusted the RPMs on the drill press, i never could get the bit to really bite into the metal well. I think i need to learn more about drilling metal.
The final manufacturing step is bending the ends to the right angle. Follow the advice of those that tell you not to sweat the precise angle --- the ends will bend to the exact angle they need to at assembly time. But do bend them to about the right angle because this helps make assembly easier. Use a "stop block" jig to make it easy to bend to about the right angle. For this dome that means just try to bend them all to about 17 degrees. I used a woodworkers' vise to do the job.
I liked the idea from here to use carraige bolts instead of hex-head, which makes the outside surface smoother and less likely to snag or rip the covering. I got 3/8 inch by 2 inch zinc carraige bolts. Even though some recommend 2.5 inch to make assembly easier, i found that 2 inch was perfectly adequate and is of course safer since less bolt sticks out inside. Also i ain't no bolt expert but i almost bought galvanized hardware until i realized that it's something like 3 times as expensive as zinc, and this seems like the easiest part to replace if it really does ever corrode. One twist with these carraige bolts is that they have a square profile (bigger than the 3/8 shank of the bolt) just inside the head, so they can bite into wood i guess. Since that would mash up the soft conduit metal pretty badly, i put two zinc 1/2 inch flat cut washers on the head end to stand off the head just enough so that the square part doesn't bite into the conduit. (Washers are cheap by the box.) On the inside of the junction, one 3/8 inch fender washer (fits the bolt exactly) protects the conduit on that side, and a plain hex nut holds it all together. I noticed some slippage between the bolt head and the first 1/2 inch standoff washer while tightening, so i think i will add a lock washer there. One more detail is that you'll need a deep socket to tighten that nut from the indide, with the bolt end protruding into the socket.
Assembly of the frame is pretty straightforward. Help from one other person is very useful at a couple of points in the process. For this dome, something a couple of feet tall to stand on (but not a ladder) is needed to reach the top. The best suggestions are finish one layer at a time, and leave the socket wrench aside until all the pieces are in place, then tighten eveything, highest bolts first.
Yeah, yeah, it's strong, you can climb on the vertices, blah blah blah. You've already seen this on all the dome sites. But have you seen one person hanging on another person hanging on the dome? (See above.)
Dome radius is 8.372 feet. Declination (from top) of apex is 40 degrees, i.e. 8.372 times cos(40) = 6.413' = 6' 4" 15/16.
| Strut | Strut ratio (ratio of hole-to-hole-length to dome radius) |
hole-to-hole length |
Pipe cut length (hole-to-hole-length plus 2 times 3/4" excess) |
| Top (qty. 2) | 0.38722 | 3.242' = 3' 2" 14/16 | 3.367' = 3' 4" 6/16 |
| Middle (qty. 2) | 0.62014 | 5.192' = 5' 2" 5/16 | 5.317' = 5' 3" 13/16 |
| Bottom (qty. 2) | 0.88167 | 7.381' = 7' 4" 9/16 | 7.506' = 7' 6" 1/16 |
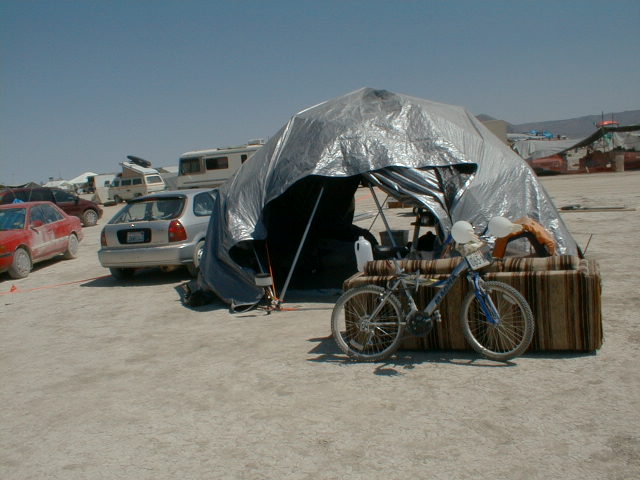
In the end what i actually did was to buy some silver/black tarps from Thor Tarp. (Thor calls them "DuraShield 6500".) I got one 20-foot by 30-foot tarp, which was positioned over the dome so that the entrance in the front and a ventilation opening in the back were not covered. Then to close the vent opening i had a 6-foot by 8-foot tarp, and to close the entrance there were two 8-foot by 10-foot tarps that could overlap a bit at the centerline. All three small tarps were tucked under the big tarp (which overlapped them a bit) to keep any rain out. All the tarps were bungeed to the frame liberally (i used 10 or more bungees) and the long ends of the big tarp, which were on the ground anyway, were weighted down very well from the inside. This photo gives you some idea - you can see the front and back openings all opened up for the daytime heat.
For the floor i had a piece of carpet which will cover a good bit of the area. Underneath that i put a piece of plastic covering the whole circle, just to keep things clean. In retrospect, the plastic probably didn't make any difference for carpet that got dumped anyway. (My concern originally was that the playa dust would work its way up through the carpet, but that didn't happen in other domes that i was in.)
Well, after hauling screw anchors out to the desert, i was pretty glad to have access to rebar as a backup, because the screw anchors just didn't work. Specifically the problem was that the anchors would not hold; they would pull out with little force even when carefully screwed down 2 or 3 feet. The year i tried this (2001) the playa floor was unusually crumbly due to irregular climate that year (lack of rain had kept the playa from getting its annual packing-down after the fluffing-up from the frost), but i'm convinced that this wouldn't have worked well under normal circumstances on the playa. From now on i'll plan on using straight rebar with rope.
On the other hand if you are planning to install a dome someplace where the ground will hold screw anchors well (i.e. not "Lake" Lahontan) you could still try this idea.